Besan Chilla Recipe (Besan ka Cheela)

How to Make Besan Chilla
Preparation for the Batter
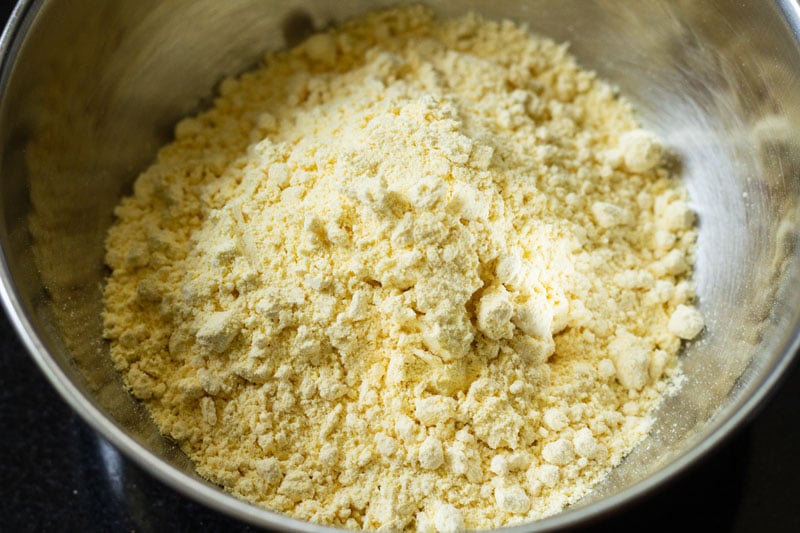
1. First, measure 1 cup of gram flour (besan) and pour it into a mixing bowl. Replace gram flour with chickpea flour if you do not have it.
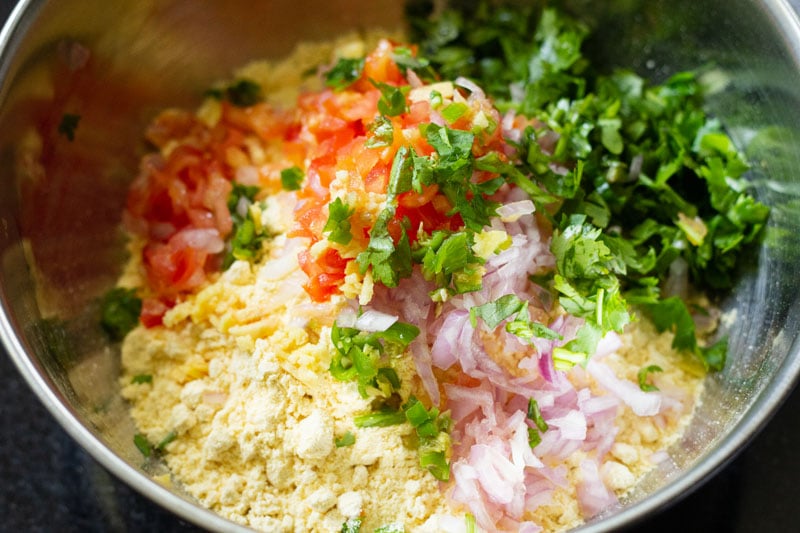
2. Next, add in your chopped veggies and herbs. It’s important to make sure all of these ingredients are FINELY chopped, otherwise, it becomes difficult to spread the chilla in the pan.
Here are the ingredients you should include in this step:
- ¼ cup finely chopped onions
- ¼ cup finely chopped tomatoes
- ½ teaspoon finely chopped ginger
- ¼ cup finely chopped coriander leaves (cilantro)
- ½ teaspoon finely chopped green chilies or serrano peppers
Note: If you’re cooking besan cheela for smaller children, I’d recommend leaving out the green chilies and red chilli powder altogether. On the other hand, if you prefer more heat, you can add up to ⅔ teaspoon of the finely chopped chilies.
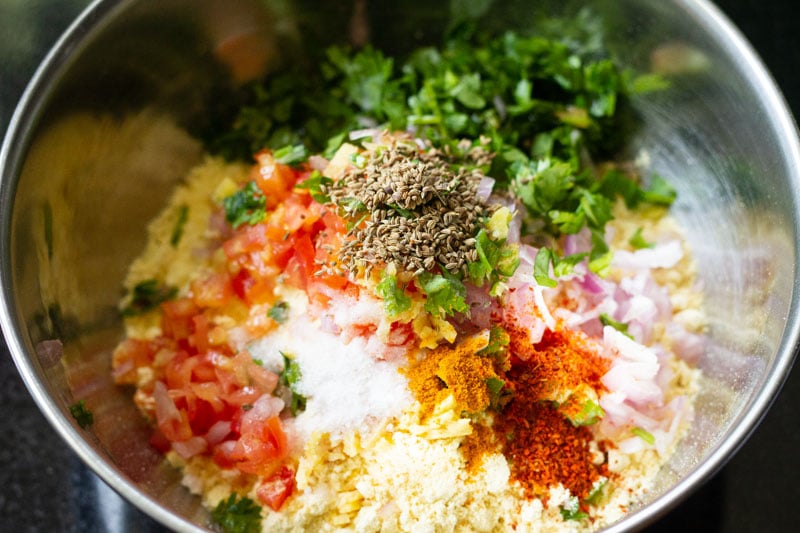
3. Then it is time to mix in the spices, including 2 to 3 pinches of turmeric powder, ½ teaspoon carom seeds (ajwain) and ¼ teaspoon red chili powder. Also add salt as per your liking at this step.
Note: If needed, you can substitute cumin seeds in this besan chilla recipe if you do not have carom seeds or omit them completely. Carom seeds help in digestion and also give a good flavor to the chilla.
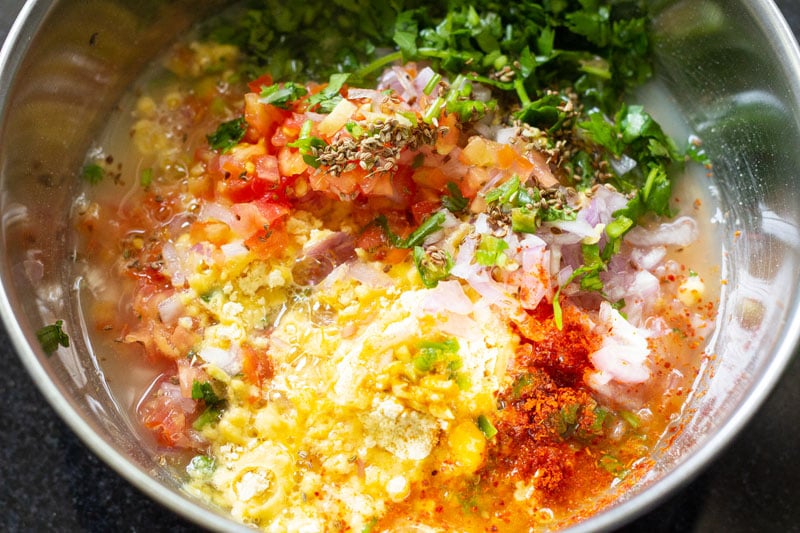
4. Before you start to stir or combine your ingredients, first add half a cup of water to the besan cheela mixture.
Make Chilla Batter
5. Next use a wired whisk to combine all of the besan chilla ingredients. Then, add an additional 1 to 3 tablespoons of water, depending on the quality and texture of the besan.
Tip: Coarsely ground besan will need more water than finely ground besan.
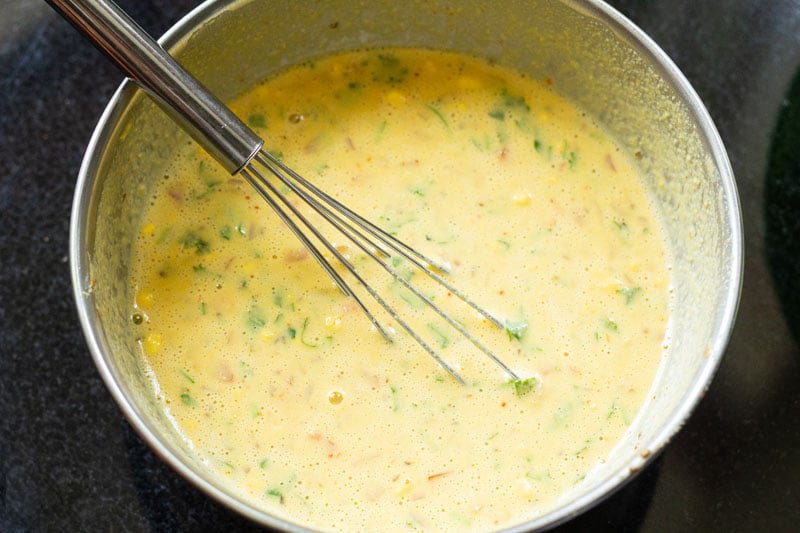
6. Continue whisking until the batter has a smooth, flowing consistency. There shouldn’t be any lumps, so make sure to break those up while mixing the batter.
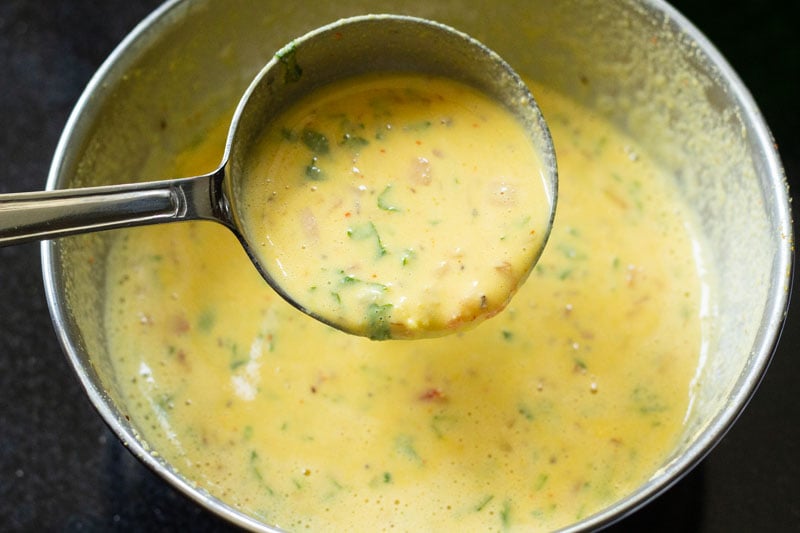
Make Besan Chilla
7. Finally, you can begin cooking your besan chilla! I use a tawa (flat, round-shaped pan) to cook my besan cheela, but you can also use any well seasoned frying pan or a cast iron skillet or a non-stick pan.
Whichever type of pan you’re using, heat it on a low to medium-low heat and ladle batter onto the center, much like making pancakes.
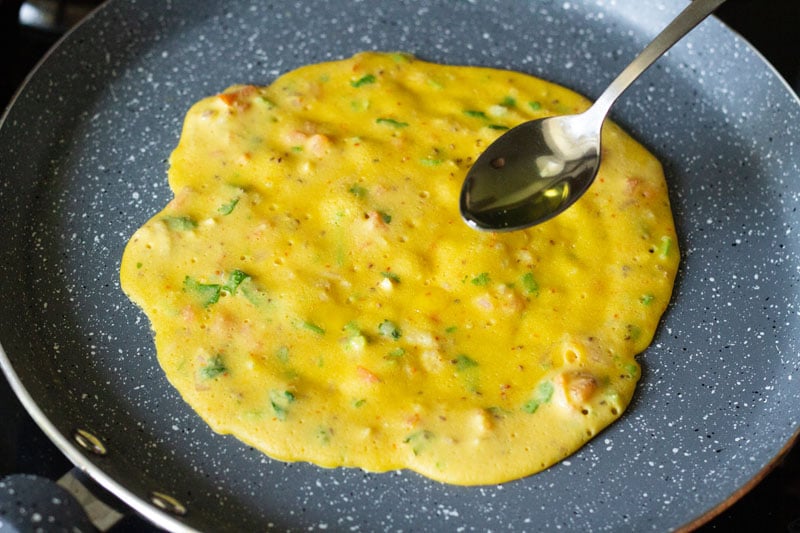
If you’re using iron skillet or tawa or a steel frying pan, let the pan become medium-hot and spread a bit of oil on it before adding the batter. Take a ladle or ¼ to ⅓ of a measuring cup full of the batter and pour on the pan.

8. Next, gently use the back of the ladle or measuring cup (if you have used one) to spread the batter. Make sure you are spreading the batter gently so that the chilla does not break.
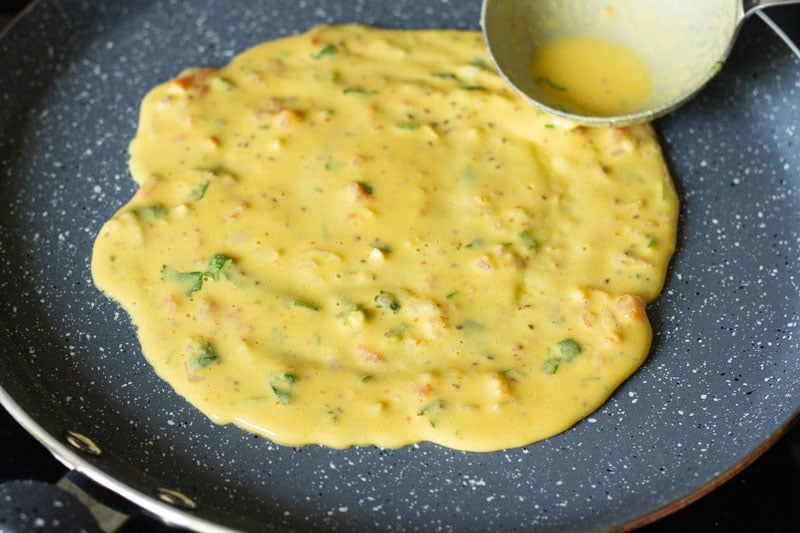
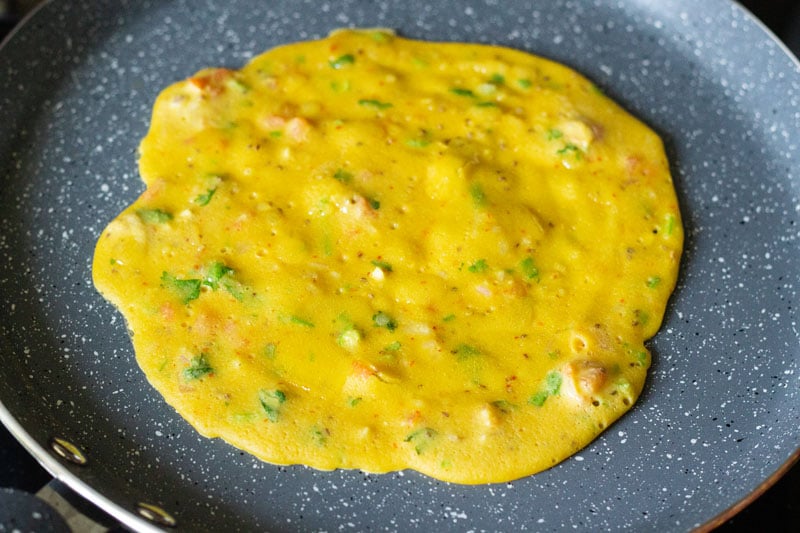
9. Then continue to cook the chilla on a low to medium-low heat until the top begins to look cooked or you start seeing some air-pockets.
10. Additionally, you can drizzle oil (about ½ to 1 teaspoon) on the chilla at the edges and all around while it is cooking to help it not stick to the pan.
In fact for a crispy chilla, you need to add more oil on the pan or skillet before pouring the batter.
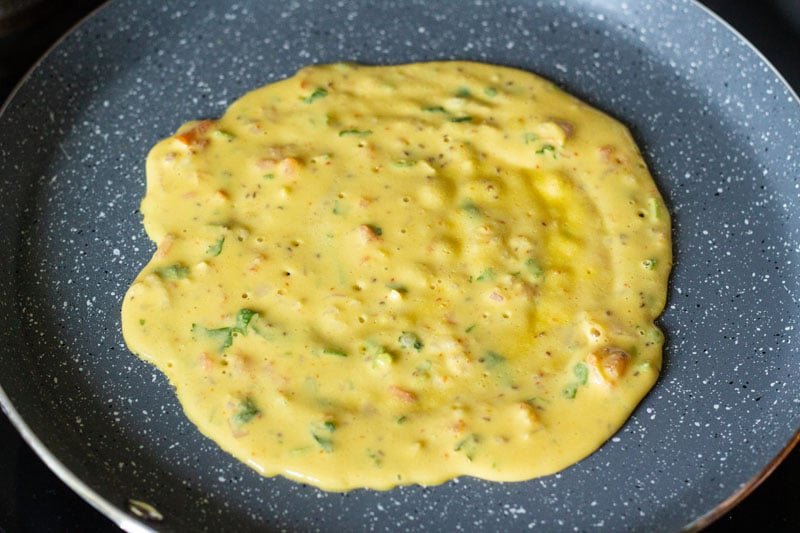
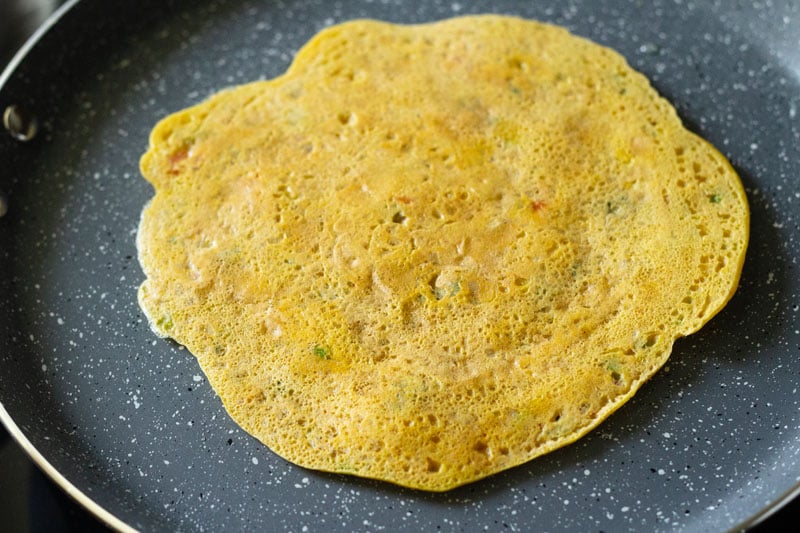
11. Next continue to cook until the base gets light golden.
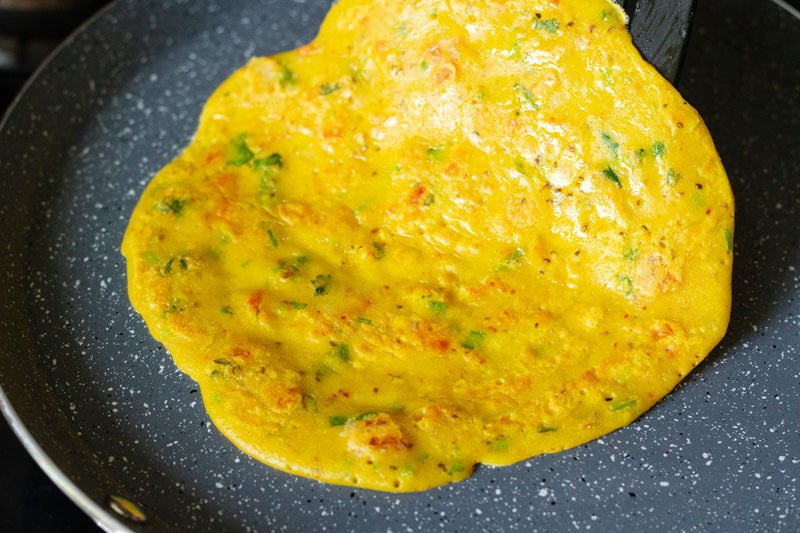
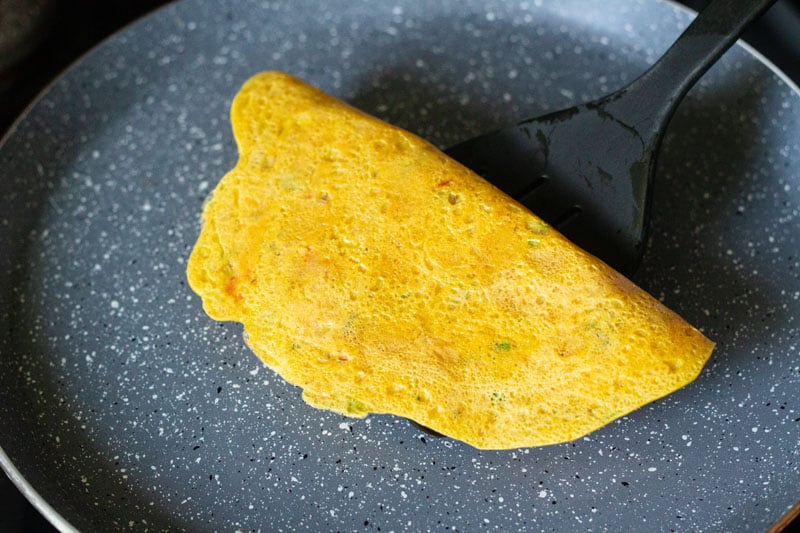
12. Then it’s time to flip your besan cheela and cook the other side.
13. Then continue cooking until you see golden spots on the besan chilla. Cook your besan chilla evenly and well. You can flip the chilla once or twice for even cooking.
14. Finally, fold your besan chilla and serve them while they’re hot! Continue to make all chilla this way. If you make a larger batch, then cook chilla on two pans or skillets.
Serving and Storing Suggestions
Besan Chilla are best served hot and crisp as soon as they are made. They taste good when they become warm too.
If I plan to serve them later in the day, I stack them in a steel box or a roti box which keeps them warm and moist.
Make these as needed. I do not suggest to make a large batch for storage. On refrigeration the chilla becomes dry and lightly dense.
Reheating them does not bring up the original flavors and they taste kind of dull.

What to eat with Besan ka Cheela?
Serve besan chilla as it is or with a side dip of coriander chutney or mint chutney or any chutney of your choice or with tomato ketchup. You can serve it with plain curd (yogurt) or raita.
We also like to have it with roti or bread. I sometimes make simple sandwiches stuffing the chilla between two bread slices spread with some coriander chutney and butter. Yum!
For more besan recipes, you can check this 50 Gram Flour Recipes.
Expert Tips
- Not just for breakfast. In addition to being a great breakfast food, besan chilla is the perfect recipe for an impromptu brunch or even an late-night snack. Simply mix the ingredients, then cook in a pan for a delicious dish in less than 20 minutes.
- I prefer tomatoes in all most (if not all) of my recipes because they just taste so good! If you’re less of a fan, you can skip the tomatoes and add in your own favorite ingredients, such as broccoli, carrots, bottle gourd, pumpkin or zucchini. Remember, though, if you’re using tomatoes or other veggies, it’s important to finely chop or even grate them.
- Fresh besan. Make sure to use besan that is fresh and not rancid. If the flour looks like having clumps and has a bitter aroma or taste, the besan is not fresh.
- Scaling. You can easily scale the chilla recipe and make a big batch.
- Leavening ingredients. Generally, we do not add any leavening ingredients like baking soda or baking powder in besan chilla. But for a fluffy soft chilla like that of a vegan omelette, you can add a pinch of baking soda or ¼ teaspoon baking powder in the batter.


No comments:
Post a Comment