
How to make Dahi Vada
Soak & Grind Lentils
1. Soak 1 cup heaped urad dal (200 grams husked and split black lentils) overnight or for at least 4 to 5 hours.
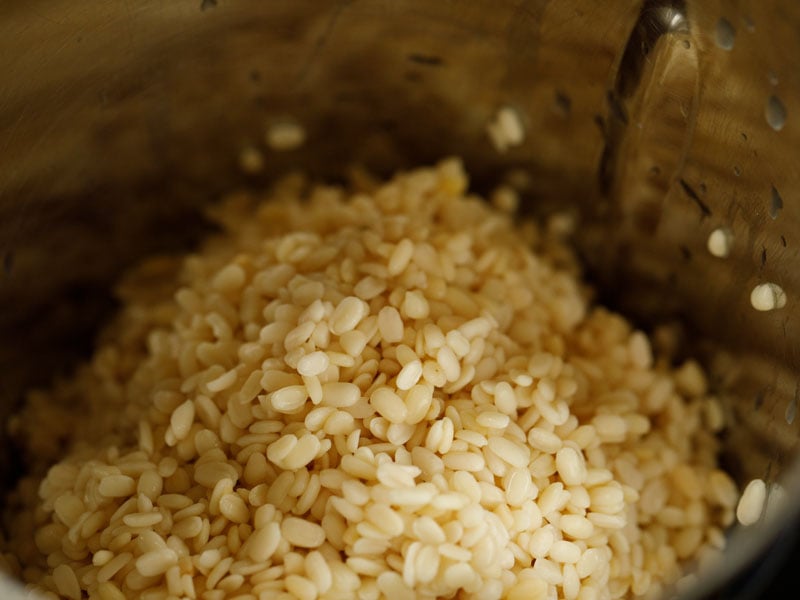
Later drain all the water using a colander or strainer. If you prefer, you can rinse the soaked urad dal prior to grinding the lentils.
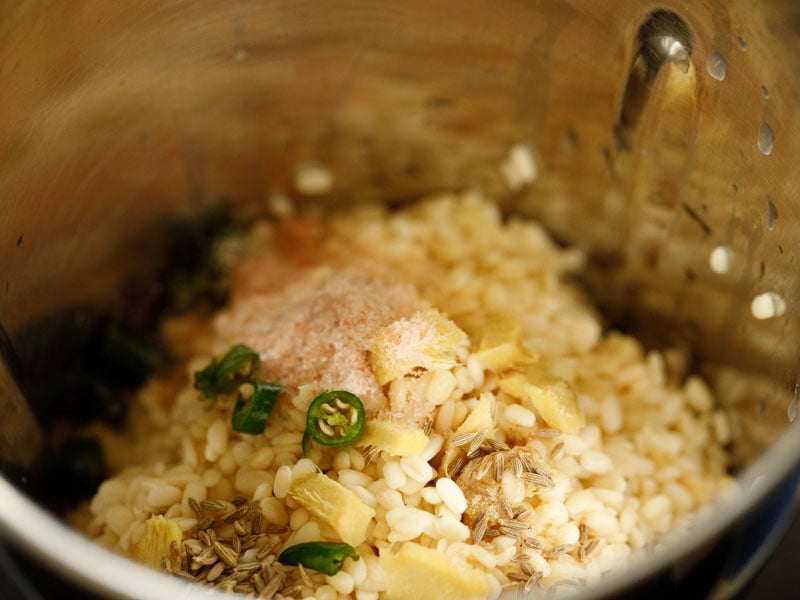
2. Then add the drained and soaked lentils in your trusted blender or mixer-grinder.
3. Add in the following spices and herbs:
- ½ teaspoon chopped green chilies or serrano/thai chillies
- 1 teaspoon chopped ginger
- 1 teaspoon cumin seeds
- 1 pinch of asafoetida (hing)
- salt as needed
Note: For a gluten-free version, use a gluten-free asafoetida or skip it.
4. Blend or grind adding ¼ cup to ½ cup water in parts to a smooth fluffy batter.
Depending on the quality, age of lentils and soaking time the water amount can vary from ½ to ¾ cup. Keep in mind that the batter has a thick to medium-thick flowing consistency.
Grind in two batches or one batch depending on the capacity and size of your blender or mixer-grinder.
Tip 1: Adding a lot of water will make the batter thin which will result in a flat vada that absorbs more oil. A thin or runny batter will always absorb more oil while frying.
Tip 2: If the batter becomes thin or watery, add some rice flour or sooji (rava, semolina) to the batter and mix thoroughly to thicken it. Do not add too much of sooji as it can make the vada have a dense and hard texture.
Tip 3: To check if the batter has the right consistency, place a few drops of batter in a bowl of water. The batter having the right consistency will float on top of the water surface. If the batter has become thin, it will sink or dissolve in the water.
Aerate The Batter
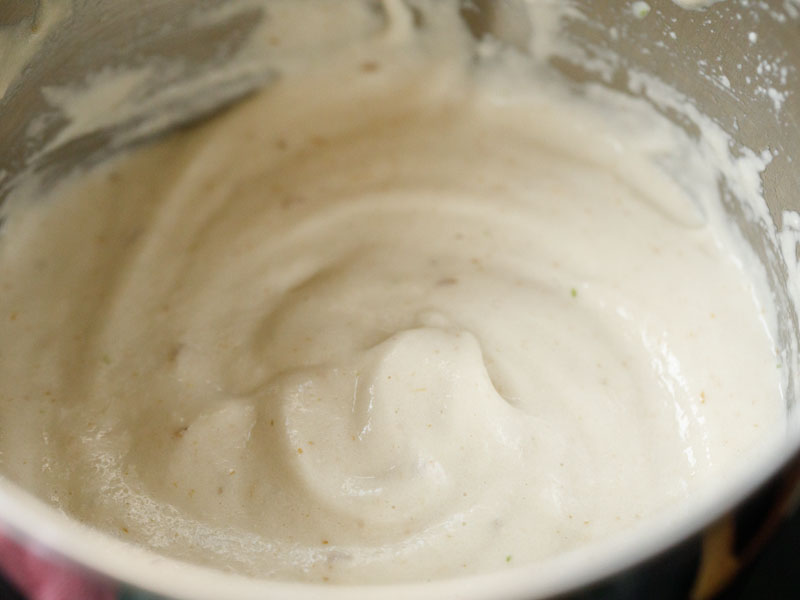
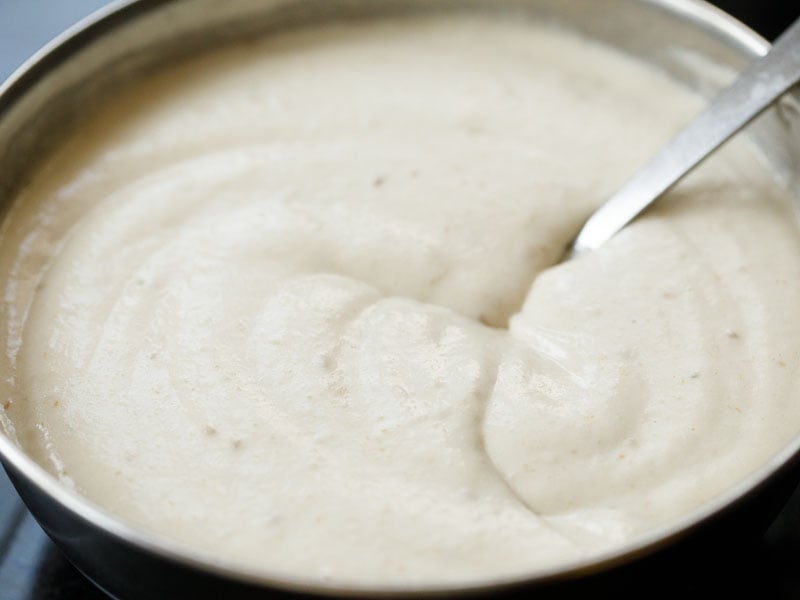
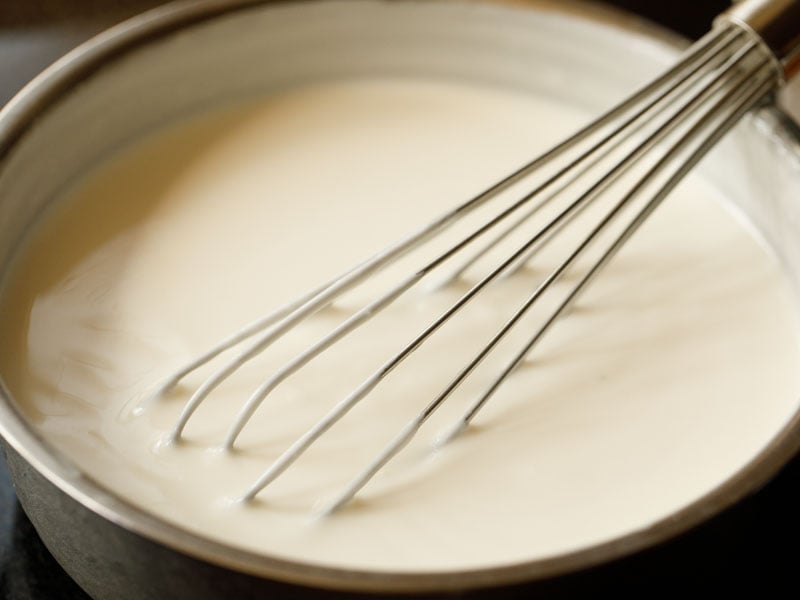
5. Take the ground batter in a bowl with a help of a silicon spatula. Then briskly and vigorously whip the batter for two to three minutes with a spoon, whisk or spatula.
Whipping the batter aerates it and makes it more fluffy and light. As a result, you get softer and porous vada. A photo below showing the consistency of the batter.
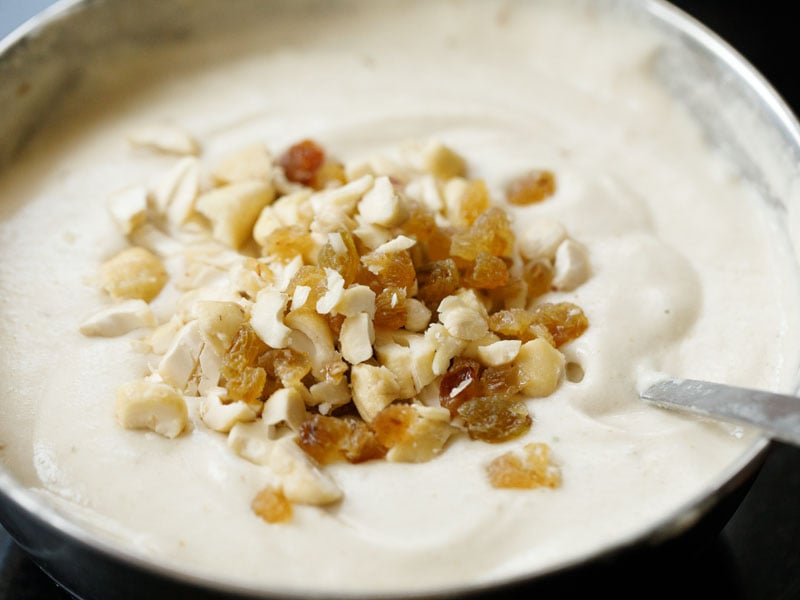
6. Stir in 1 tablespoon raisins (chopped) and 12 to 15 cashews (chopped roughly). These are optional ingredients and you can skip them if you want.
Check Oil Temperature
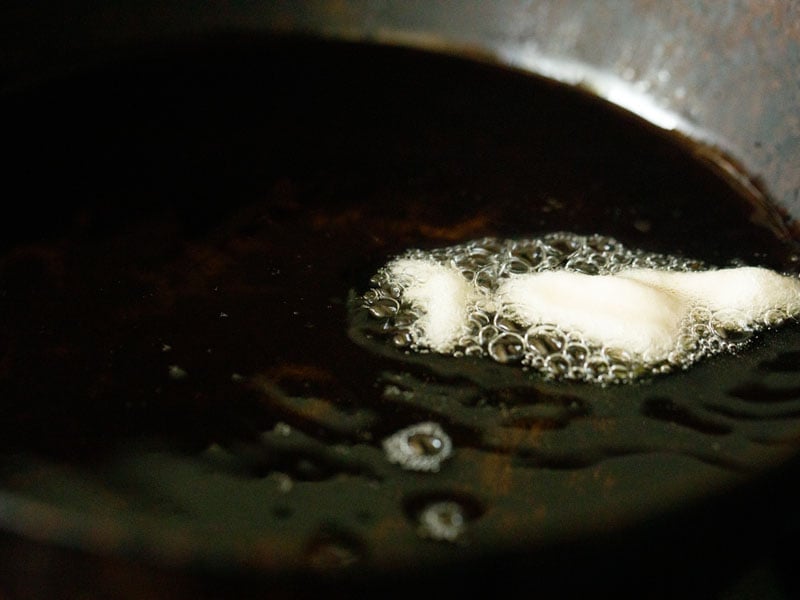
7. Heat oil as needed for deep frying in a kadai (Indian wok) or pan. Heat oil on medium heat. The oil should reach a temperature of 180 to 190 degrees Celsius.
To check without a thermometer, add some droplets of the batter with a spoon. It should sizzle and come up on the surface of oil swiftly and gradually.
If the batter droplets stay at the bottom of the pan, the oil is cold. If it comes up very quickly and becomes too browned or burnt, the oil is very hot.
Fry Vada
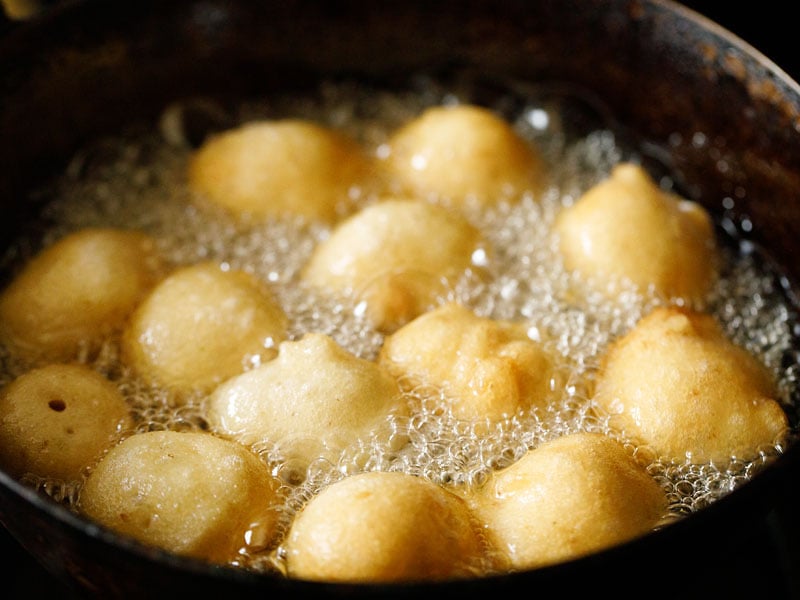
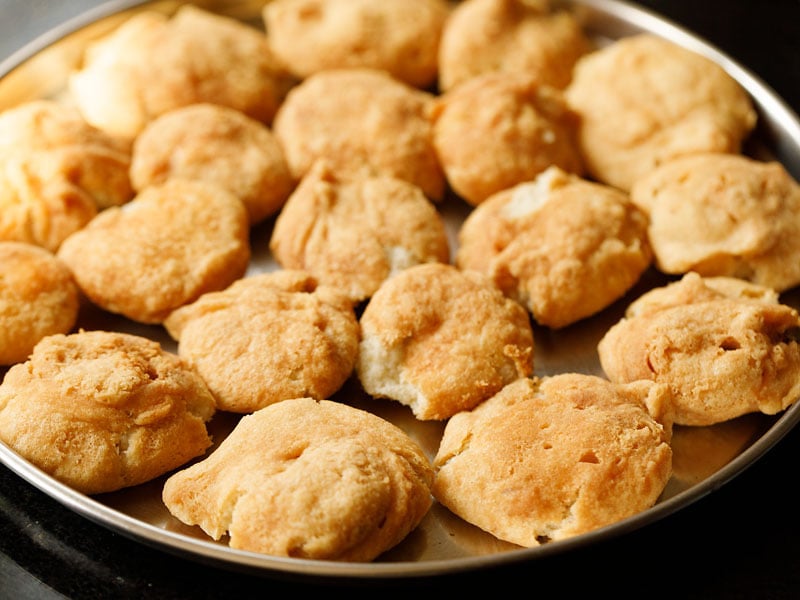
8. Once the oil has reached the correct heat or temperature, now you can either drop the batter carefully with your fingers (without touching the hot oil) or with a spoon in medium hot oil.
Fry the vada in batches until crisp and golden. I prefer to use a spoon.
You can moisten the spoon sparingly with a bit of water, so that the batter slides easily from it. But don’t add more water on the spoon as the water droplets may fall in the hot oil and can burst and create serious burns. So take care.
Make the vada having more or less the same size. If you end up making different sizes, than the smaller sized vada will fry quickly and the larger sized vada will take more time. So do take a note of it and remove the smaller vada when they look golden and crisp all over.
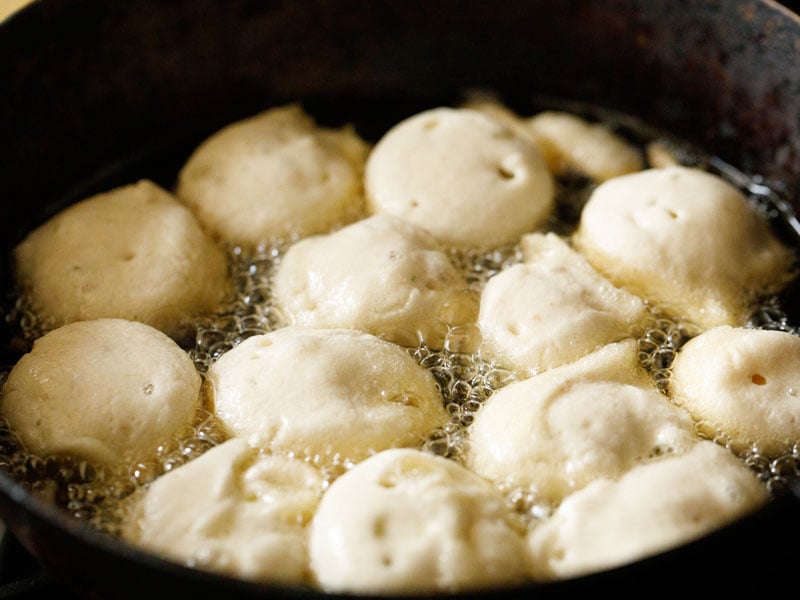
Do not overcrowd the pan or kadai. Overcrowding the pan will lower the oil temperature and as a result the vadas will soak more oil. The vada also expand a bit while frying.
In the photo below, it looks as if the pan is overcrowded with the vada, but actually it is not – blame it on the photography!
9. Let the bottom side become light golden and crisp. Then only turn these or they will break in the oil.
10. Flip again and for a couple of times more while frying. This ensures even cooking and you should see a uniform golden color all over.
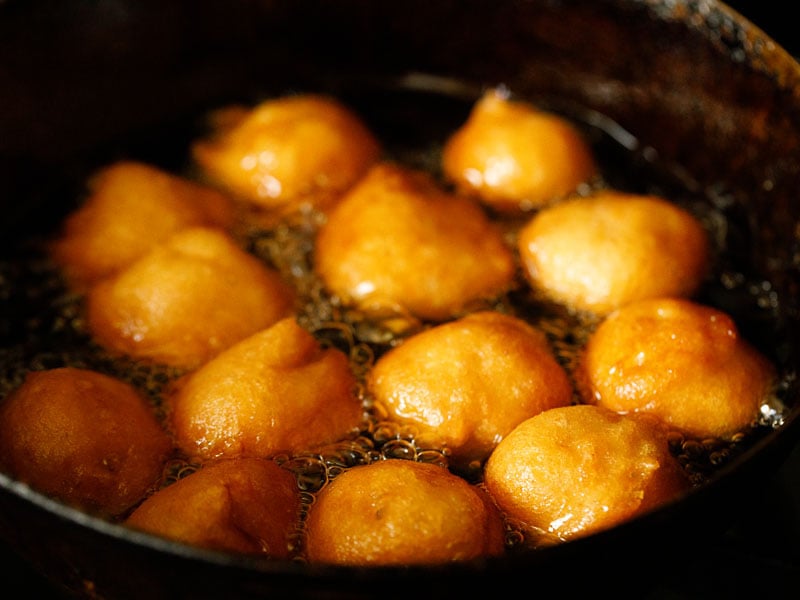
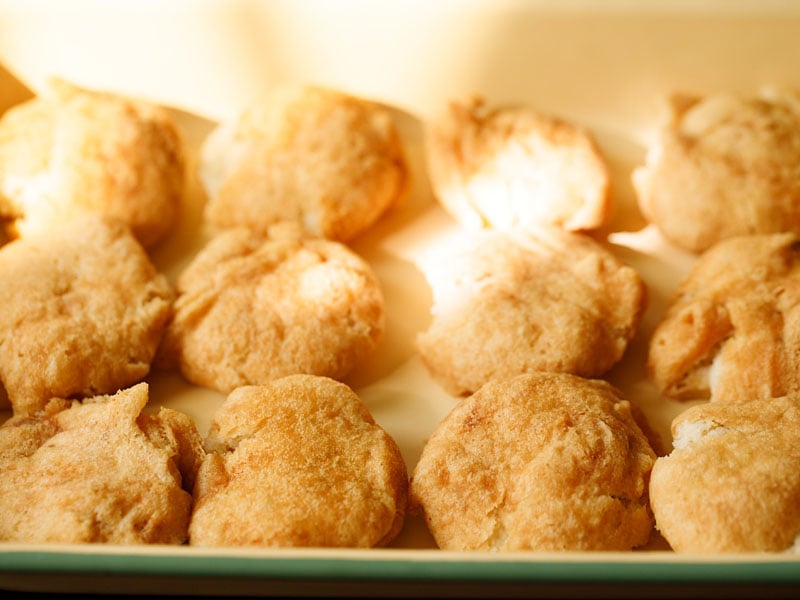
11. Place the vada on paper towels. This way fry the remaining vada in batches using up the entire batter.
If you want use half portion of the batter, then refrigerate the batter for a couple of days or freeze it for a month.

Soak Vada In Water
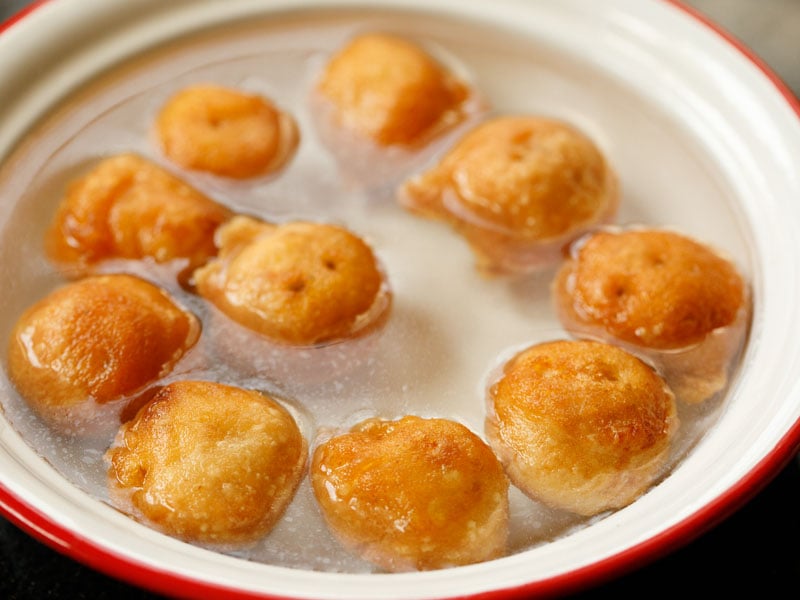
12. Wait for 2 to 3 minutes and while they are still hot, add the vada in water (at room temperature) and let them soak for 12 to 15 minutes. The vada will release some of the oil and absorb water increasing a bit in size with a color change.
13. Press each soaked vada between your palms to remove water. Gently press or else you might end up breaking them
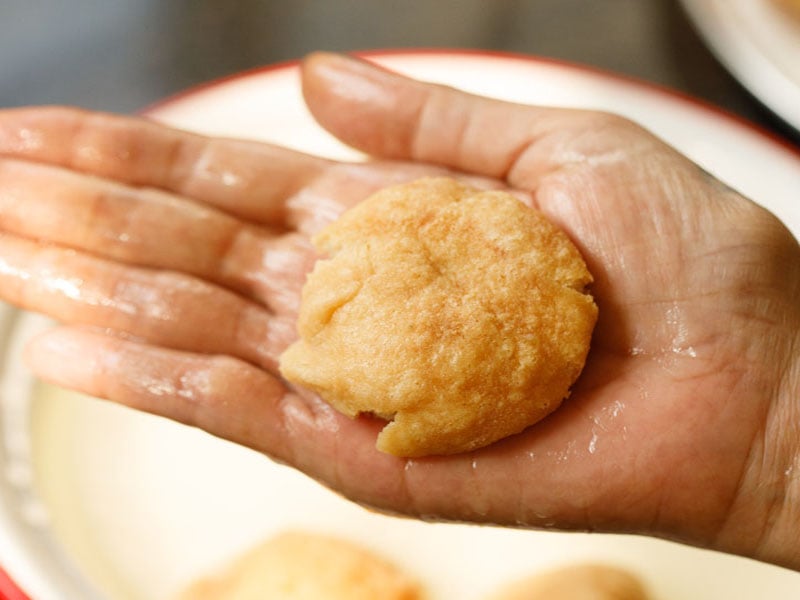
14. Press all the soaked vada this way and keep them aside in a plate or you can arrange them in the bowl or tray that you will be serving dahi vada.
Assemble & Make Dahi Vada
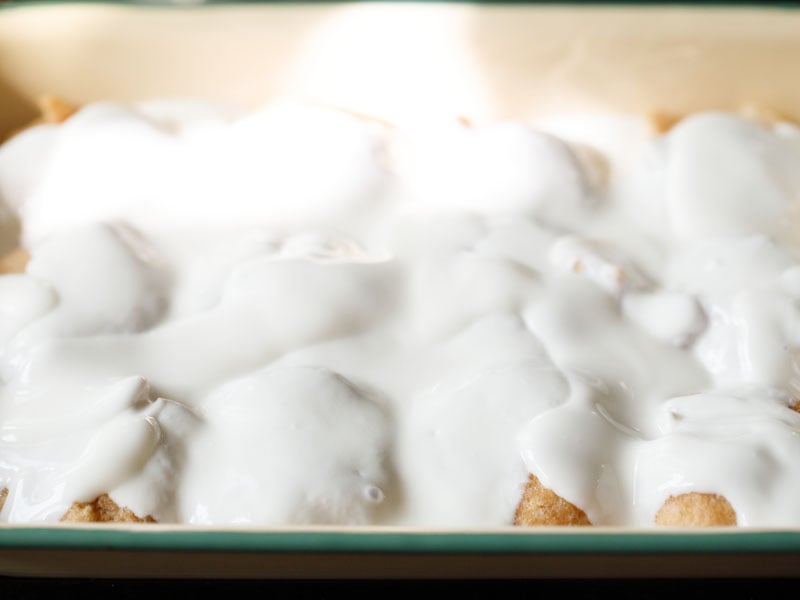
15. Beat 2.5 cups chilled curd (yogurt) until smooth. Check the taste of the curd before you assemble.
The curd should not taste sour, bitter or acidic. It should be fresh with a pleasant sweet-sour taste. I suggest to use Homemade Curd.
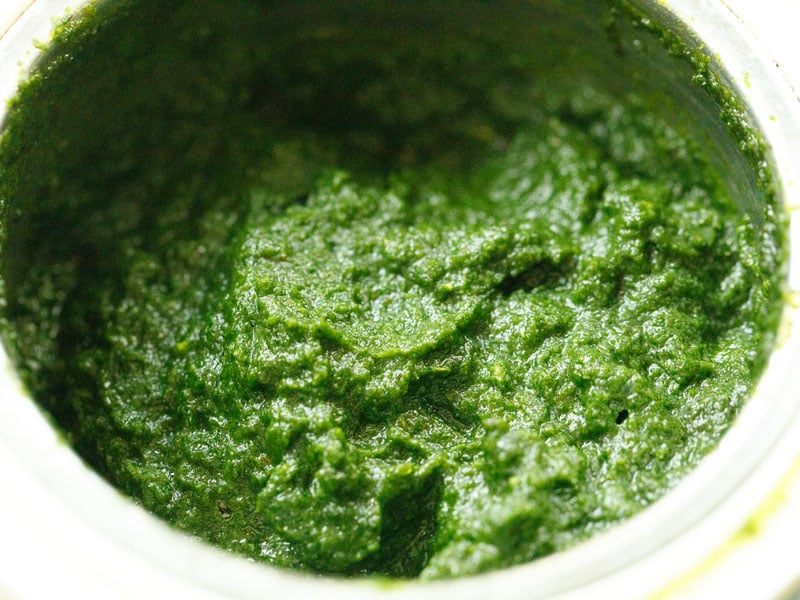
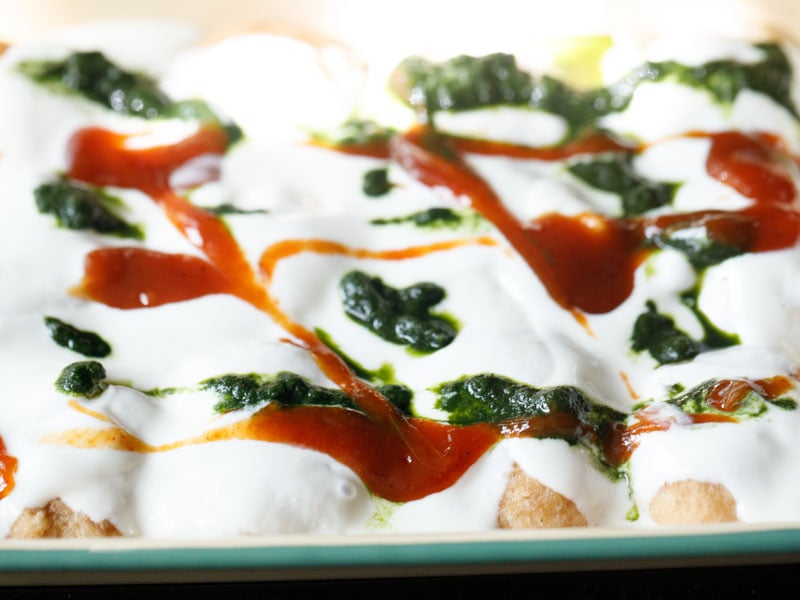
16. Keep your chutneys ready. Here is the photo of the spicy coriander (cilantro) chutney and this is how it is made.
Take the following listed ingredients in a small blender or mixer and blend until smooth.
- 2 cups coriander leaves (cilantro)
- ½ to 1 teaspoon dry mango powder (amchur powder)
- ½ teaspoon chopped garlic
- 1 teaspoon chopped green chillies
- ½ teaspoon cumin seeds or cumin powder
- salt as required
- 2 to 3 tablespoons of water or as needed
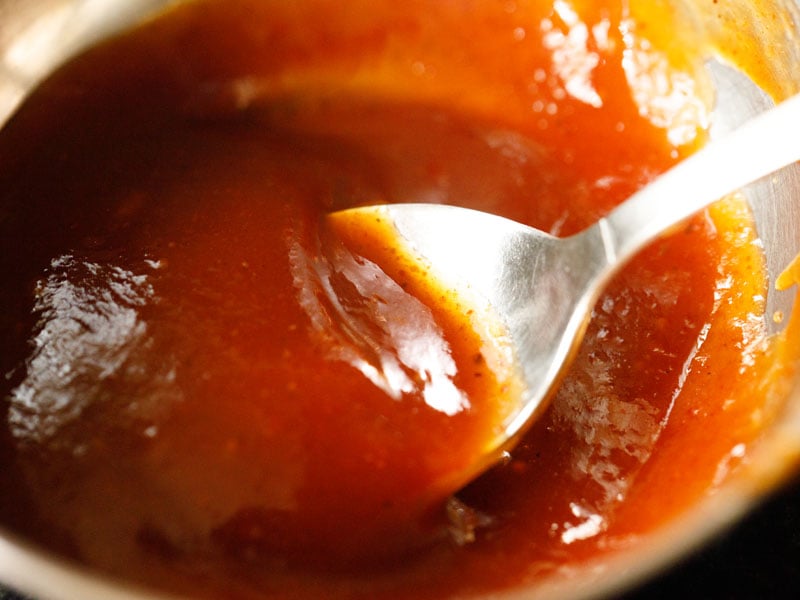
17. Below is the photo of sweet and tart tamarind chutney and you can get its recipe here – Tamarind Chutney.
You can prep the chutneys a day earlier before making dahi vada. Refrigerate both the chutneys.
18. In a large serving bowl or a tray arrange the vada which you had set aside after squeezing the water.
19. Pour the beaten curd evenly all over the vada covering them completely.
20. Pour the green coriander chutney and sweet tamarind chutney as you like.
Serving Suggestions
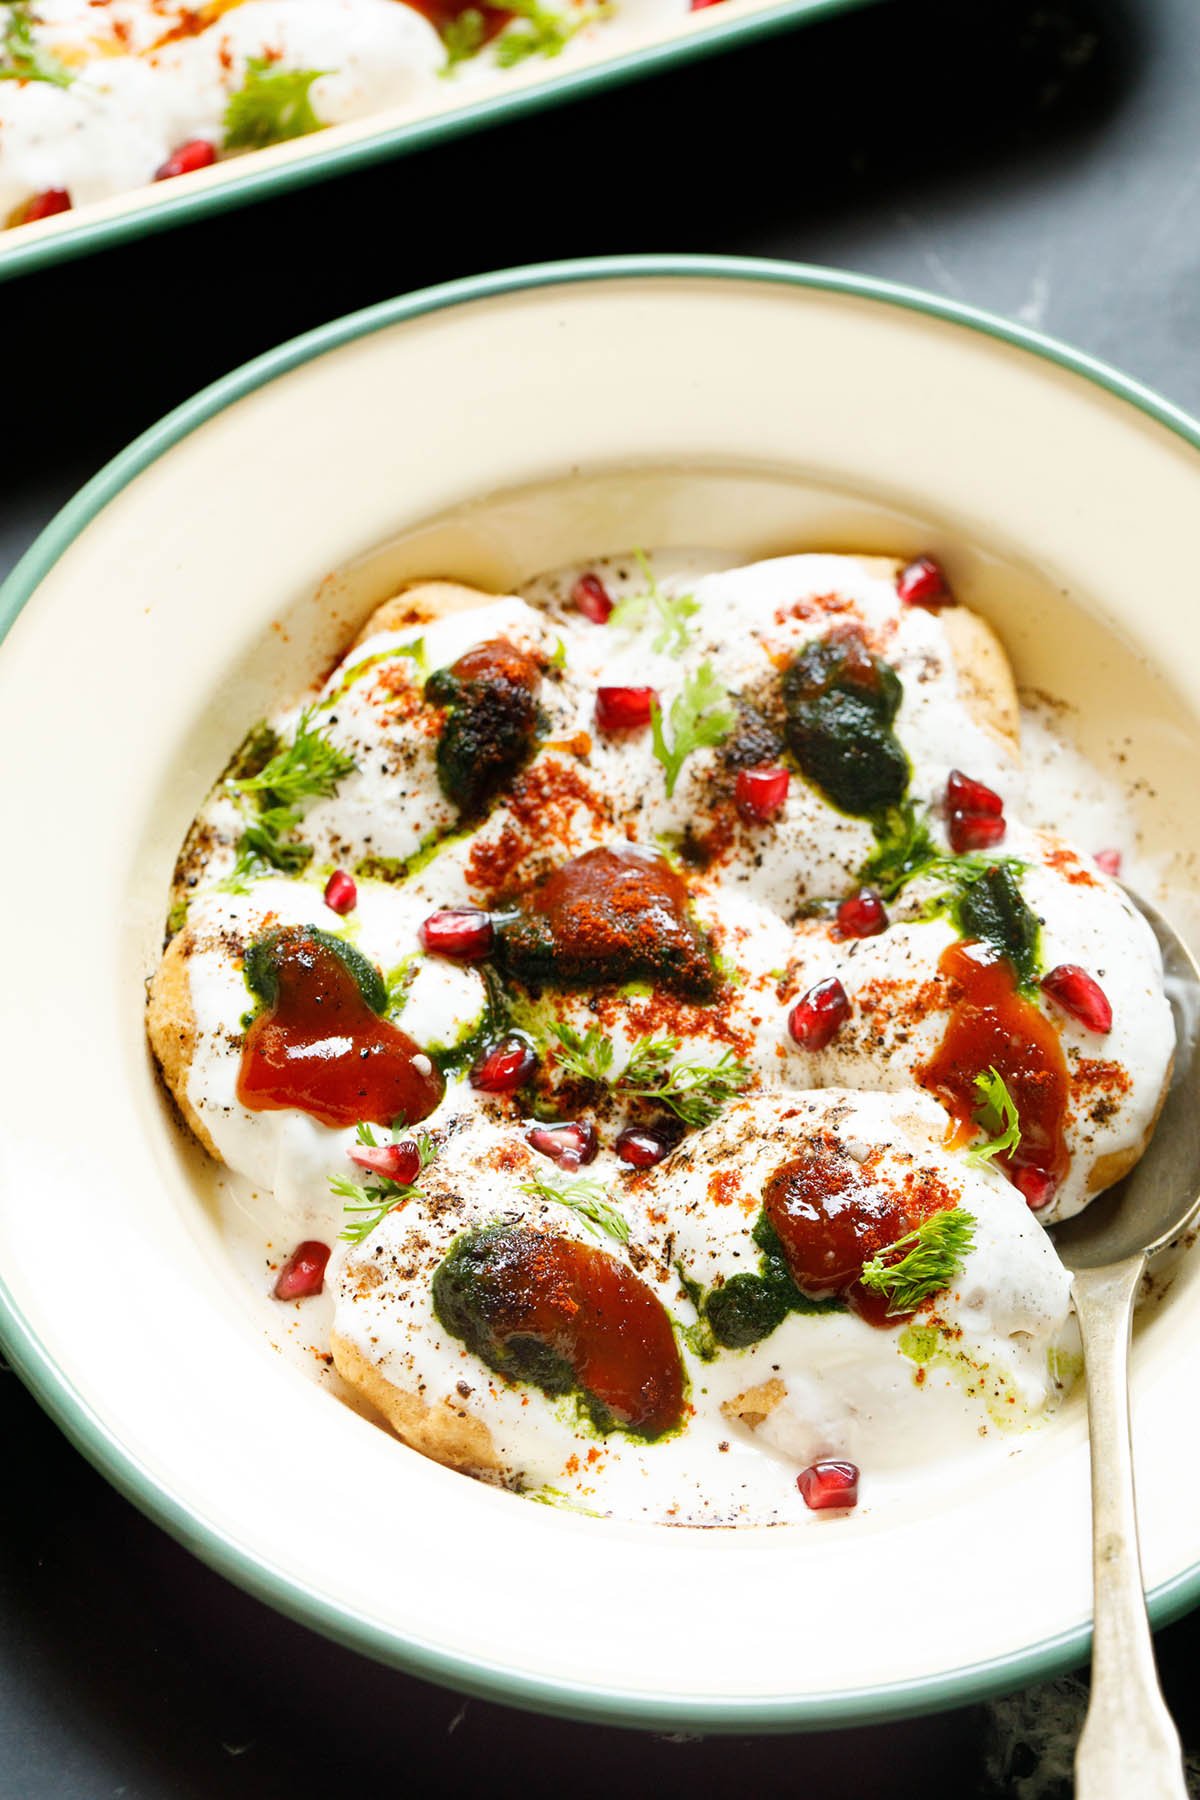
21. Sprinkle dahi vada with a few pinches of red chili powder or cayenne, roasted cumin powder, ¼ cup pomegranate arils (optional), chaat masala and/or black salt.
Garnish with 2 tablespoon coriander leaves and serve straightway. Or you can refrigerate for a couple of hours before serving.
How to store homemade Dahi Vada
Wrap the dish in plastic cling wrap or transfer to a container with a lid, and keep leftover dahi vada in the refrigerator overnight or for a day only. Any longer and the taste of the yogurt changes.
My recipe makes for 60 vada. The lentil dumplings can be made in advance and frozen before assembling the complete dish. Make the fritters per the recipe instructions, soak in water, and thoroughly squeeze out the water.
Then place in an airtight container and keep in the freezer for up to 1 to 2 months. Defrost overnight in the fridge, and then continue making the complete dahi vada recipe.
Expert Tips
Ingredient Notes
- Lentils: It is best to make dahi vada recipe with skinned urad dal. You can add about ¼ cup of moong lentils. Soak them with the urad lentils and then grind adding water as required to a smooth consistency.
- Yogurt: Always make dahi vada with fresh yogurt and not sour curd. I always use Homemade Curd, but store bought is just fine.
- Chutney: Both the Coriander Chutney and Tamarind Chutney can be made at home up to a week in advance, or bought ready made. Any leftover green chutney can be refrigerated for a couple of days. The tamarind chutney can be refrigerated in an airtight container for up to a month, and is great to serve with other Indian snacks.
Recipe Notes
- Soaking lentils: To get a good soft urad dal vada, remember to soak the lentils for 4 to 5 hours or overnight. Grind the batter really well.
- Aerating batter: Whisk the lentil batter briskly for 2 to 3 minutes. This incorporates air into the batter making the vada fluffy and soft.
- Topping Variation: You can make the dahi vada with only the sweet tamarind chutney and yogurt, and leave off the spicy green coriander chutney, if you like.
- No garlic version: To make a no-garlic version of dahi vada recipe, simply skip adding the garlic in the green coriander chutney.
- Vegan options: Use cashew yogurt, almond yogurt or coconut yogurt.
- Scaling: For a small batch, simply halve the recipe. For parties or get-togethers, double the dahi vada recipe.


No comments:
Post a Comment